Launch computational pipelines  
Currently, LaminHub only supports launching pipelines on the Seqera platform.
Launching on the Seqera platform
The following walkthrough assumes that you already registered a pipeline in LaminDB. If you didn’t, browse to the “Setup a pipeline” section. Also ensure that you have a Compute environment that includes a LAMIN_API_KEY as an env variable. It is optional but recommended to use nf-lamin. For this, modify your nextflow config as documented in nf-lamin.
Step 0: Navigate to a pipeline
Navigate to the
transformspage, e.g., lamin.ai/laminlabs/lamindata/transforms and selectPipelinesto see all pipelinesSelect your pipeline and version, e.g. nf-core/scrnaseq
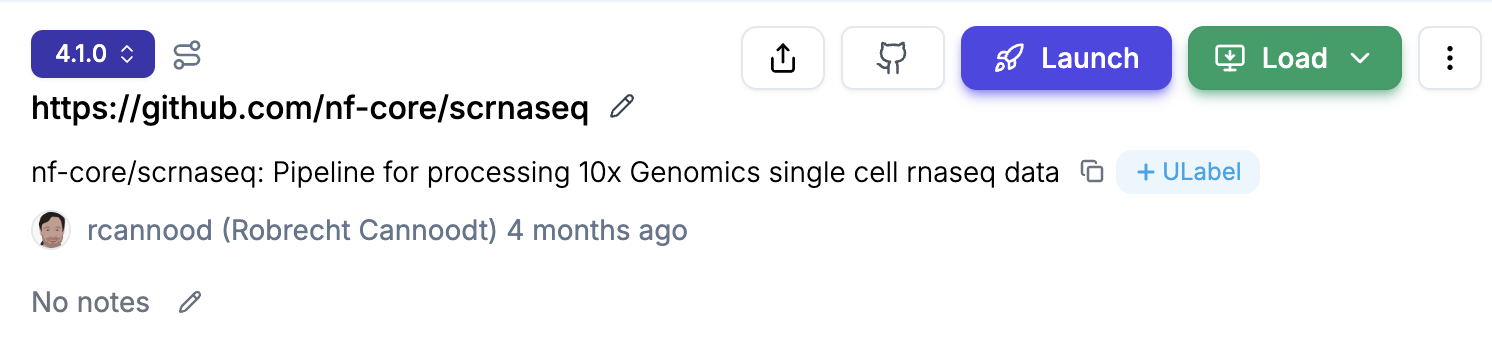
Click on the
Launchbutton and you will land on thelaunchpage. Provide your “Seqera API token” and then selectOrganization,Workspace, andCompute environment. You can also choose to “Remember this token” if you want to avoid entering the token every time.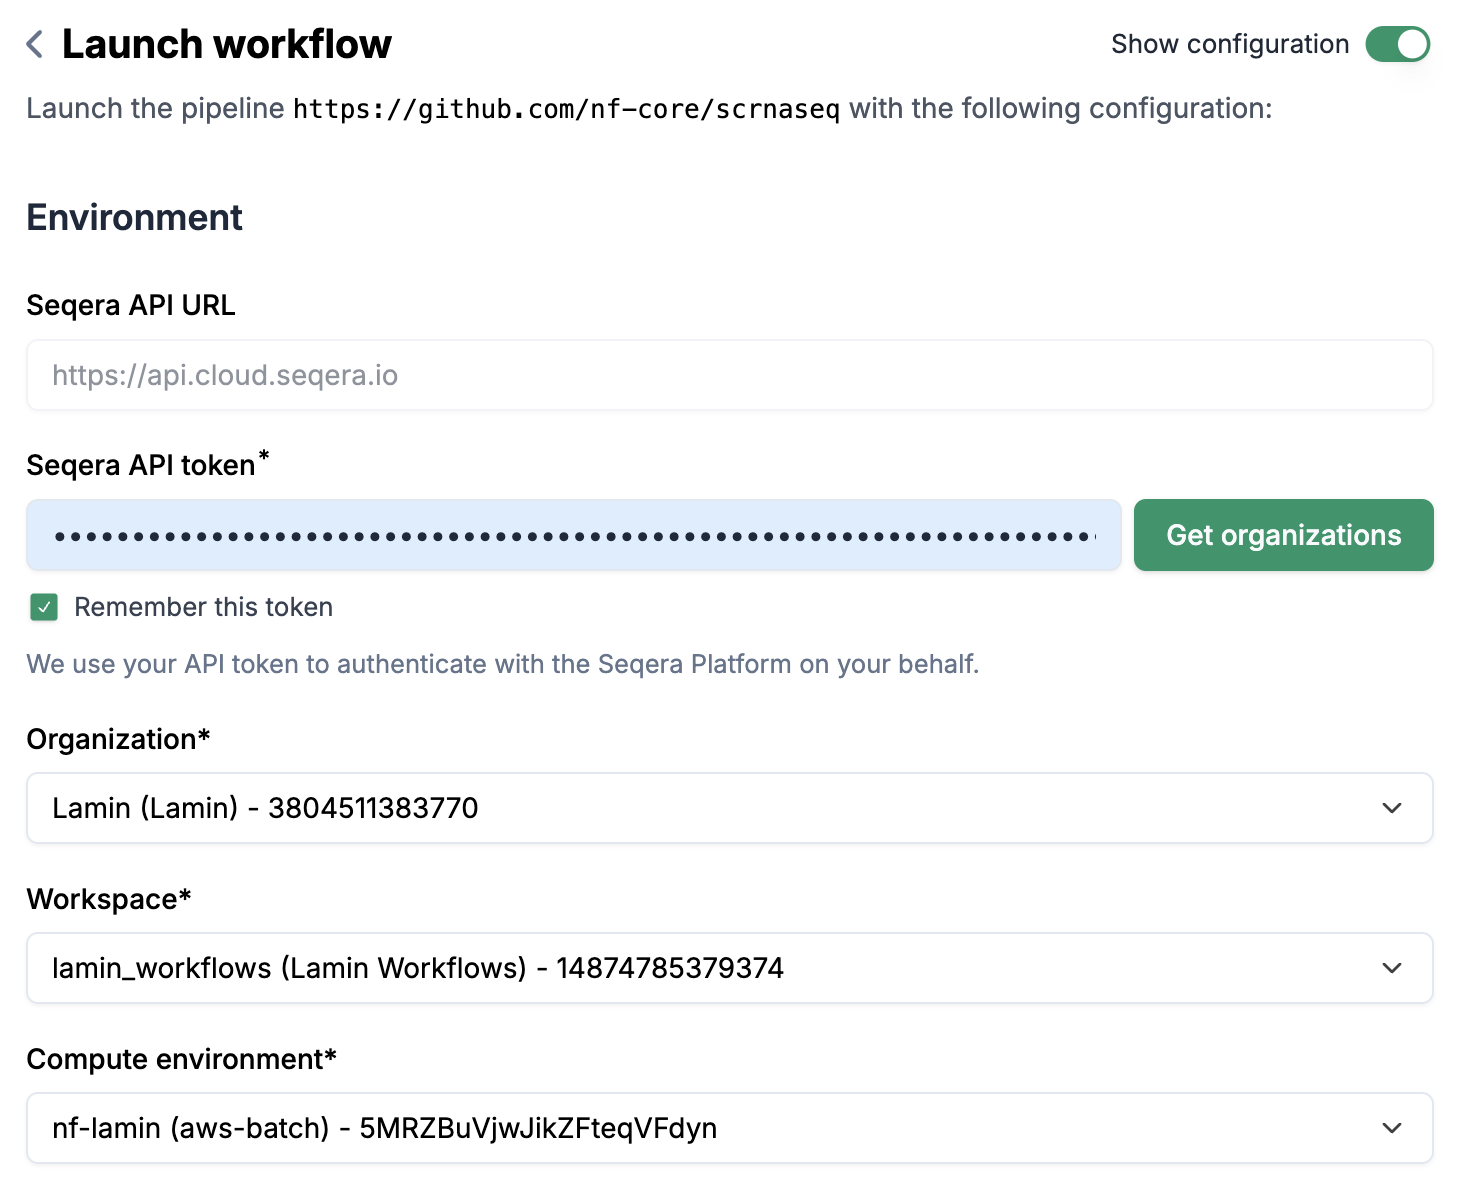
Step 1: Launch a pipeline
Optional: enter a
Run nameif you don’t want to use the auto-generated name (in form of{transform-key}-{run-number})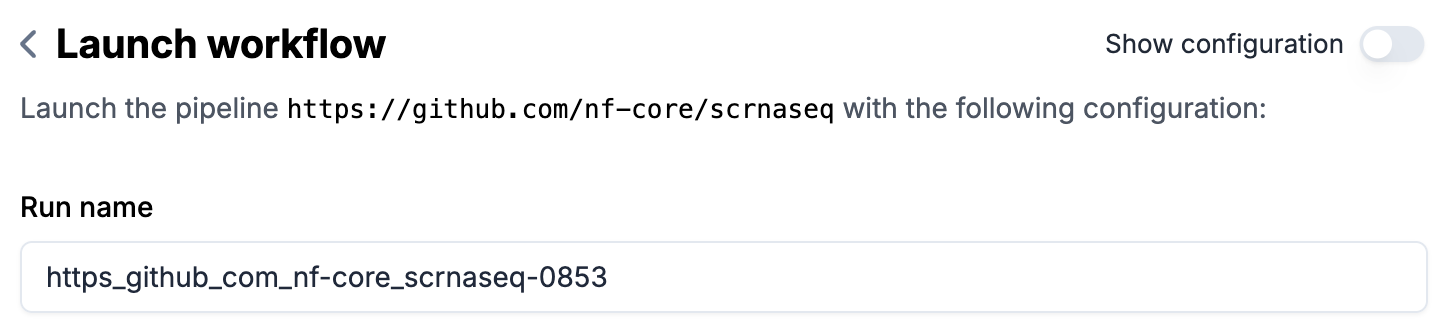
Parameters (
FormorJSON)If you prefer, you can directly edit the JSON without going through the form.
Fill out
Run metadataif configured (see setup section below for configuration)Directly fill out the form via
+ Record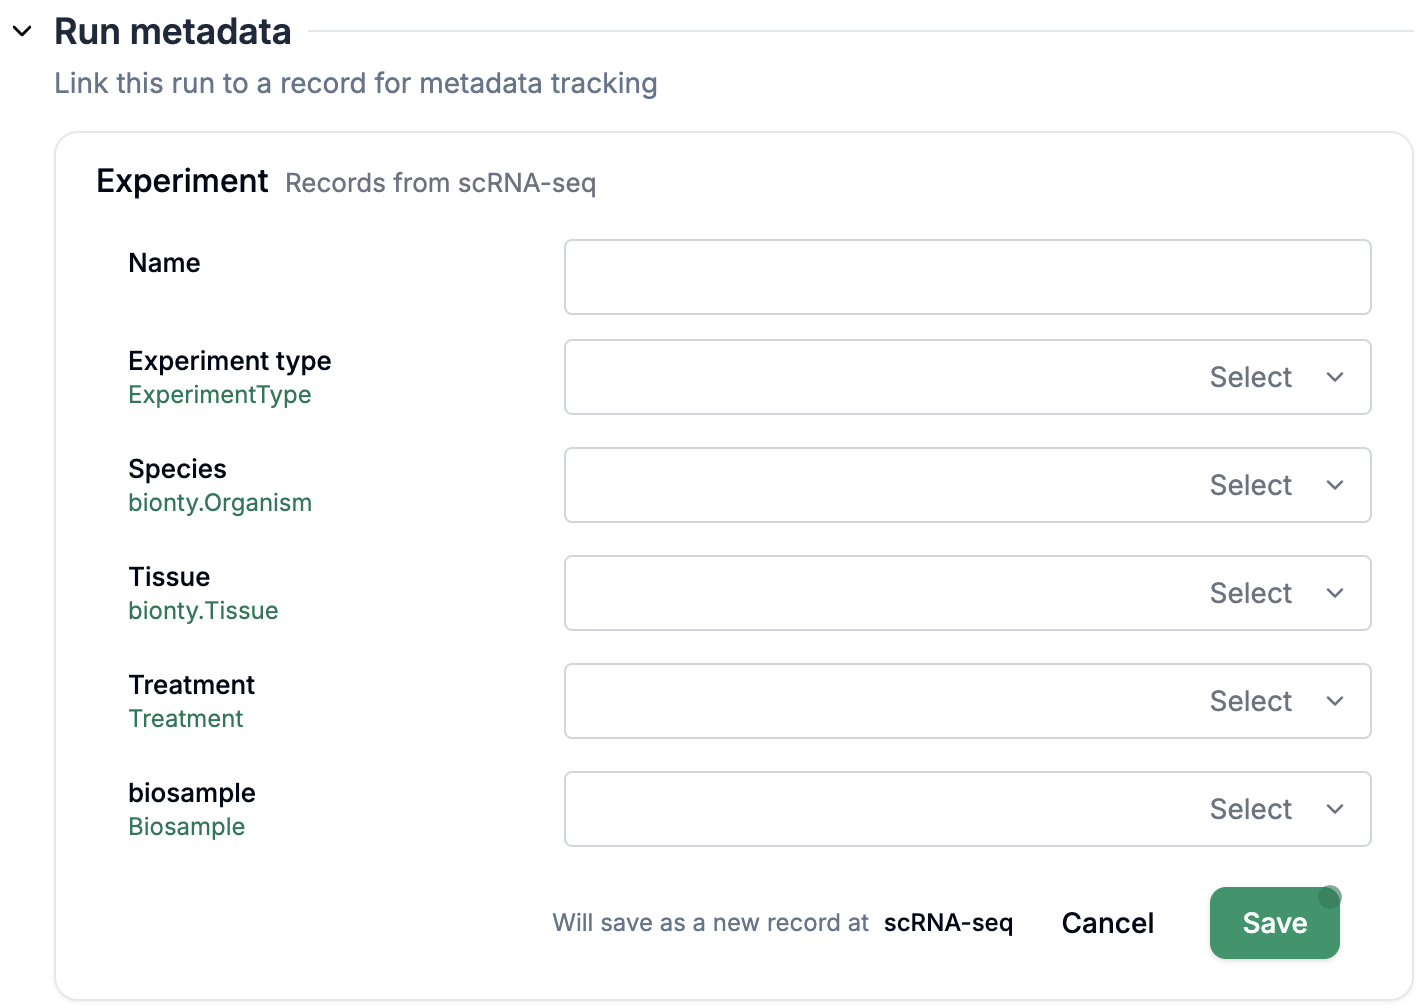
Or click
Selectto select an existing row from a sheet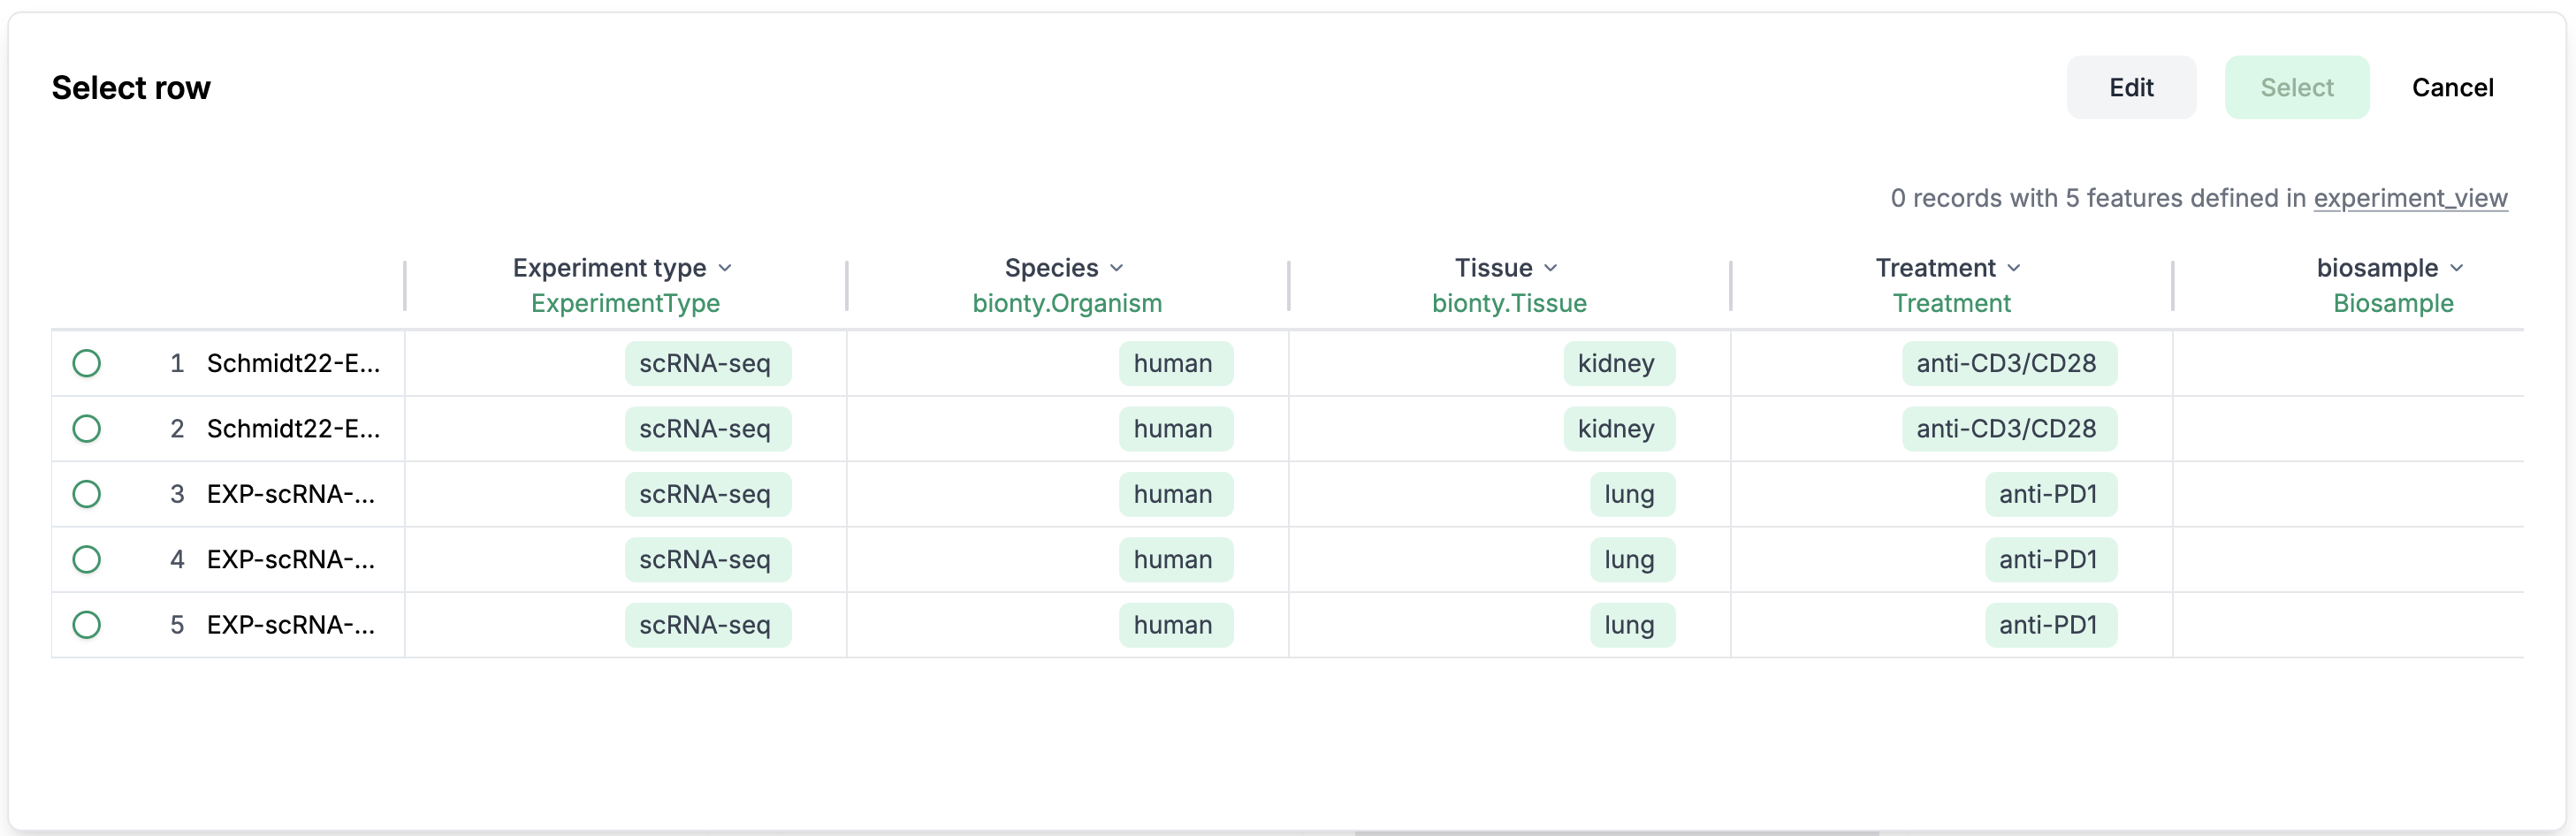
Specify a file/artifact/sheet for parameters of type file
Click on
Selectto directly select a sheet, an artifact, or a file from the s3.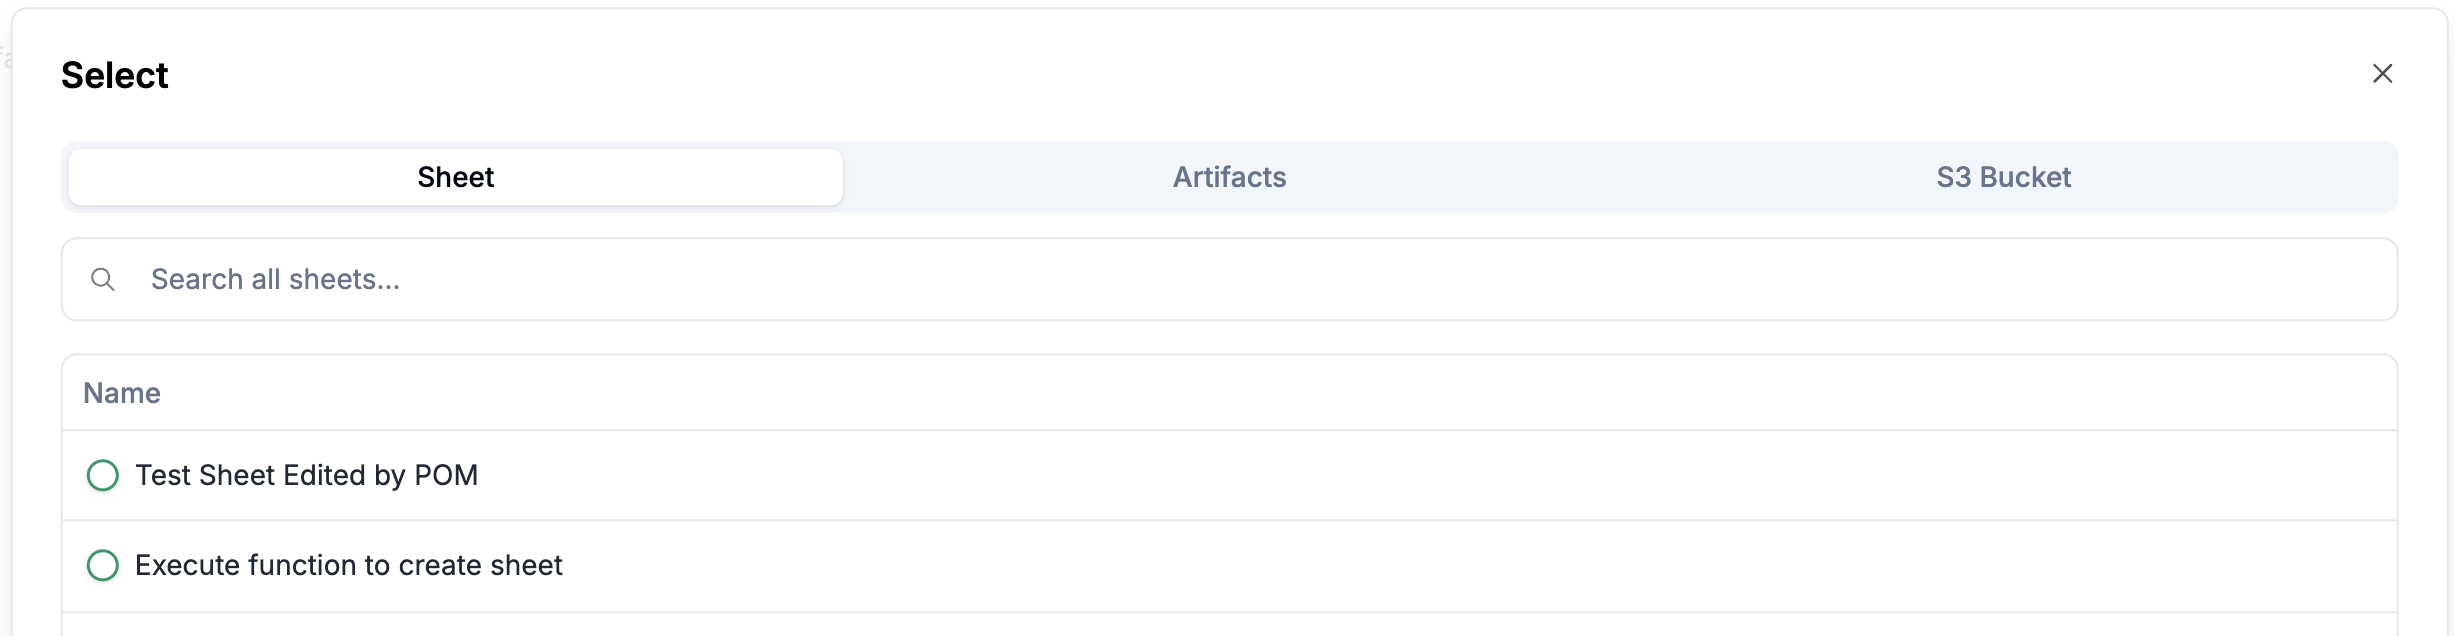
For parameters configured via
Input schemas, click the+ Createbutton to fill out a new sheet.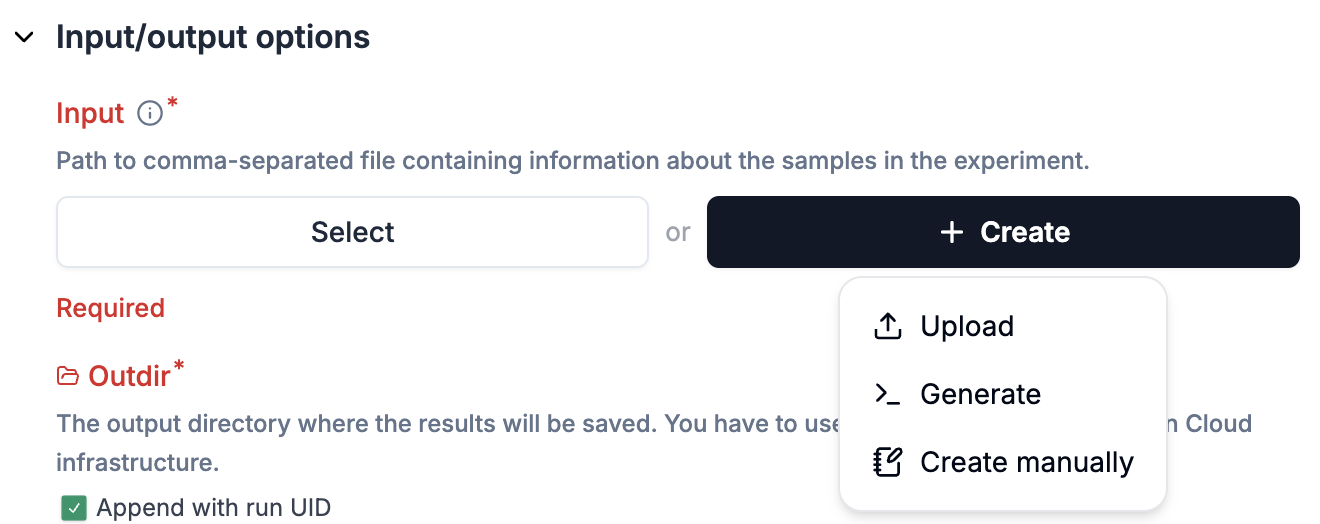
Fill out the remaining required fields marked with *, e.g.
outdirfor the scrnaseq pipelineOptional: provide the rest of parameters.
Step 2: Review and submit to Seqera
Click
Review and Submitat the bottom of the pageReview all the information you entered (can go back to edit if needed)
Click on
Submitto send the launch request to SeqeraYou will see a success message if things go well (otherwise error messages) and a run id.
You can check the triggered run on your Seqera platform.
Once the pipeline run started,
nf-laminautomatically tracks the run status. You can view them on the runs list.
Setup a pipeline
Register a pipeline as a transform via lamindb:
To register a new pipeline or a new version of an existing pipeline (please always use
Transform.from_git(); here is the API doc)import lamindb as ln # a versioned pipeline transform that points to a commit ln.Transform.from_git( url="https://github.com/nf-core/scrnaseq", path="main.nf", # Path to the main script within the repository key="nf-core/scrnaseq", # Optional key for the transform version="4.0.0", # Optional version tag to checkout in the repository ).save() # a sliding pipeline transform that points to a branch ln.Transform.from_git( url="https://github.com/nf-core/scrnaseq", path="main.nf", # Path to the main script within the repository key="nf-core/scrnaseq", # Optional key for the transform version="dev", # Version tag needs to equal branch branch="dev", # Branch to checkout ).save()
Configure the settings of a pipeline:
Switch on the
Show configurationtoggle and you will see theConfigurationsection.Click on
Settings, you will see a pop-up window with 3 tabs:Input schemas,Run metadataandEnvironment defaults.Input schemas: You can configure a schema for a parameter (e.g.input), which allows you to create a sheet according to the schema configurations.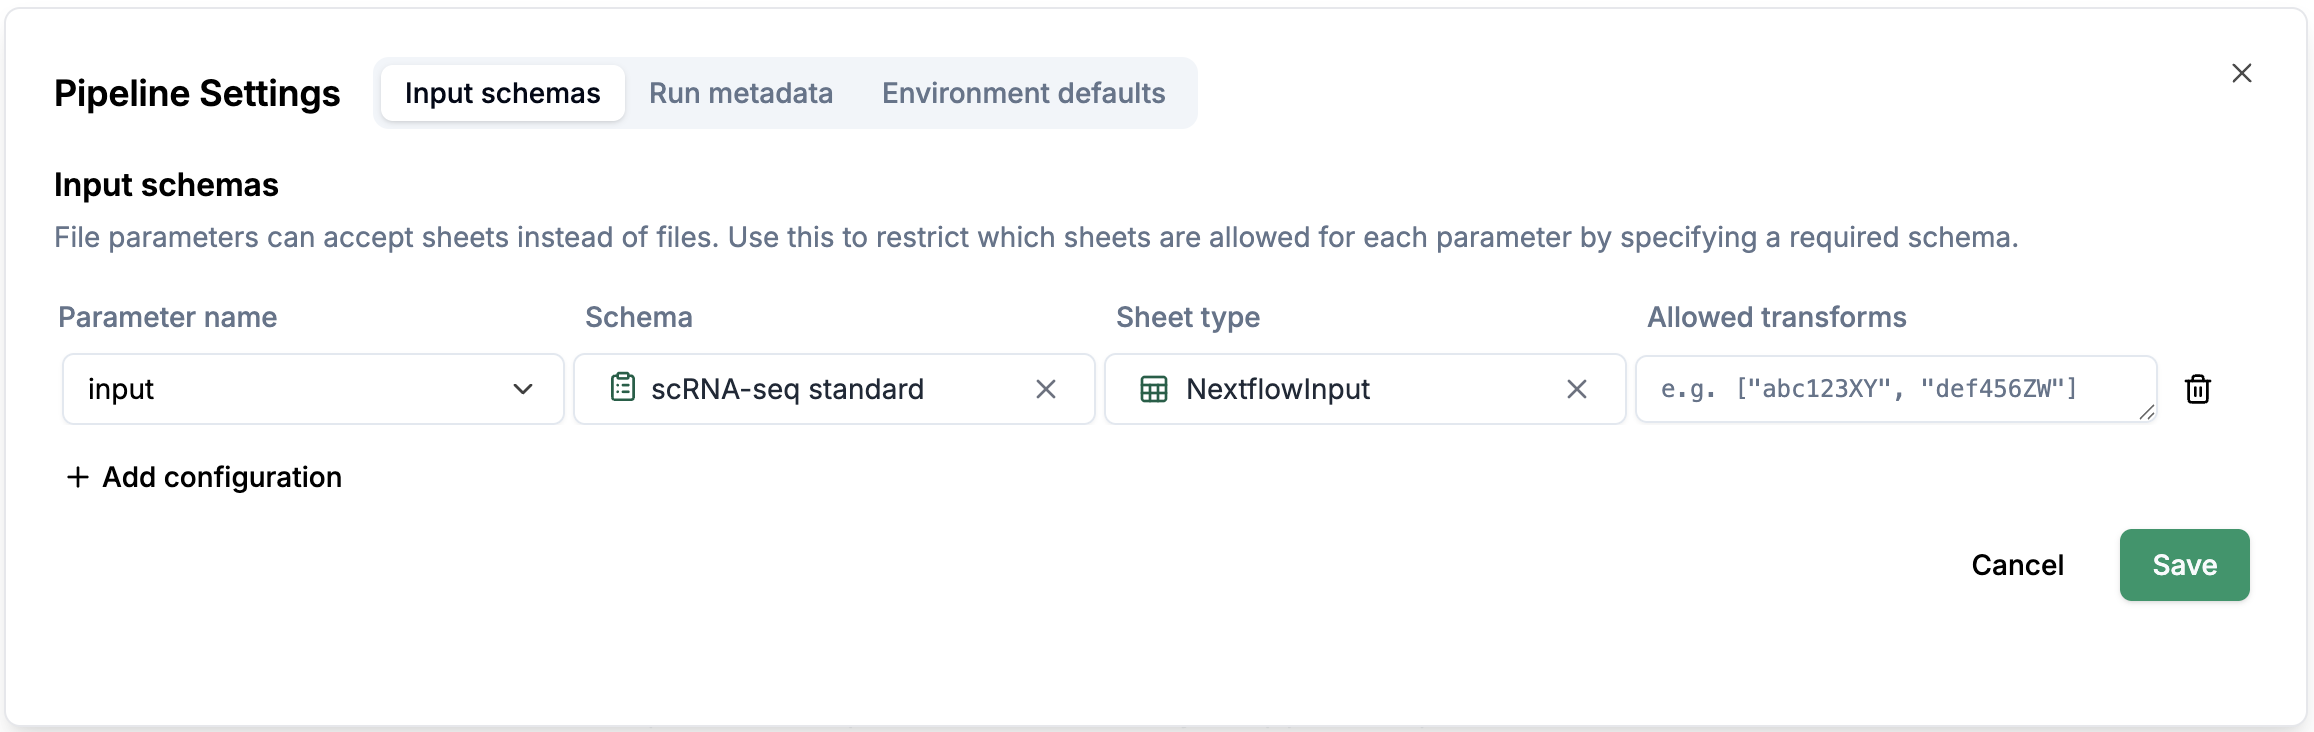
Run metadata: You can configure which sheet you want to select the metadata from.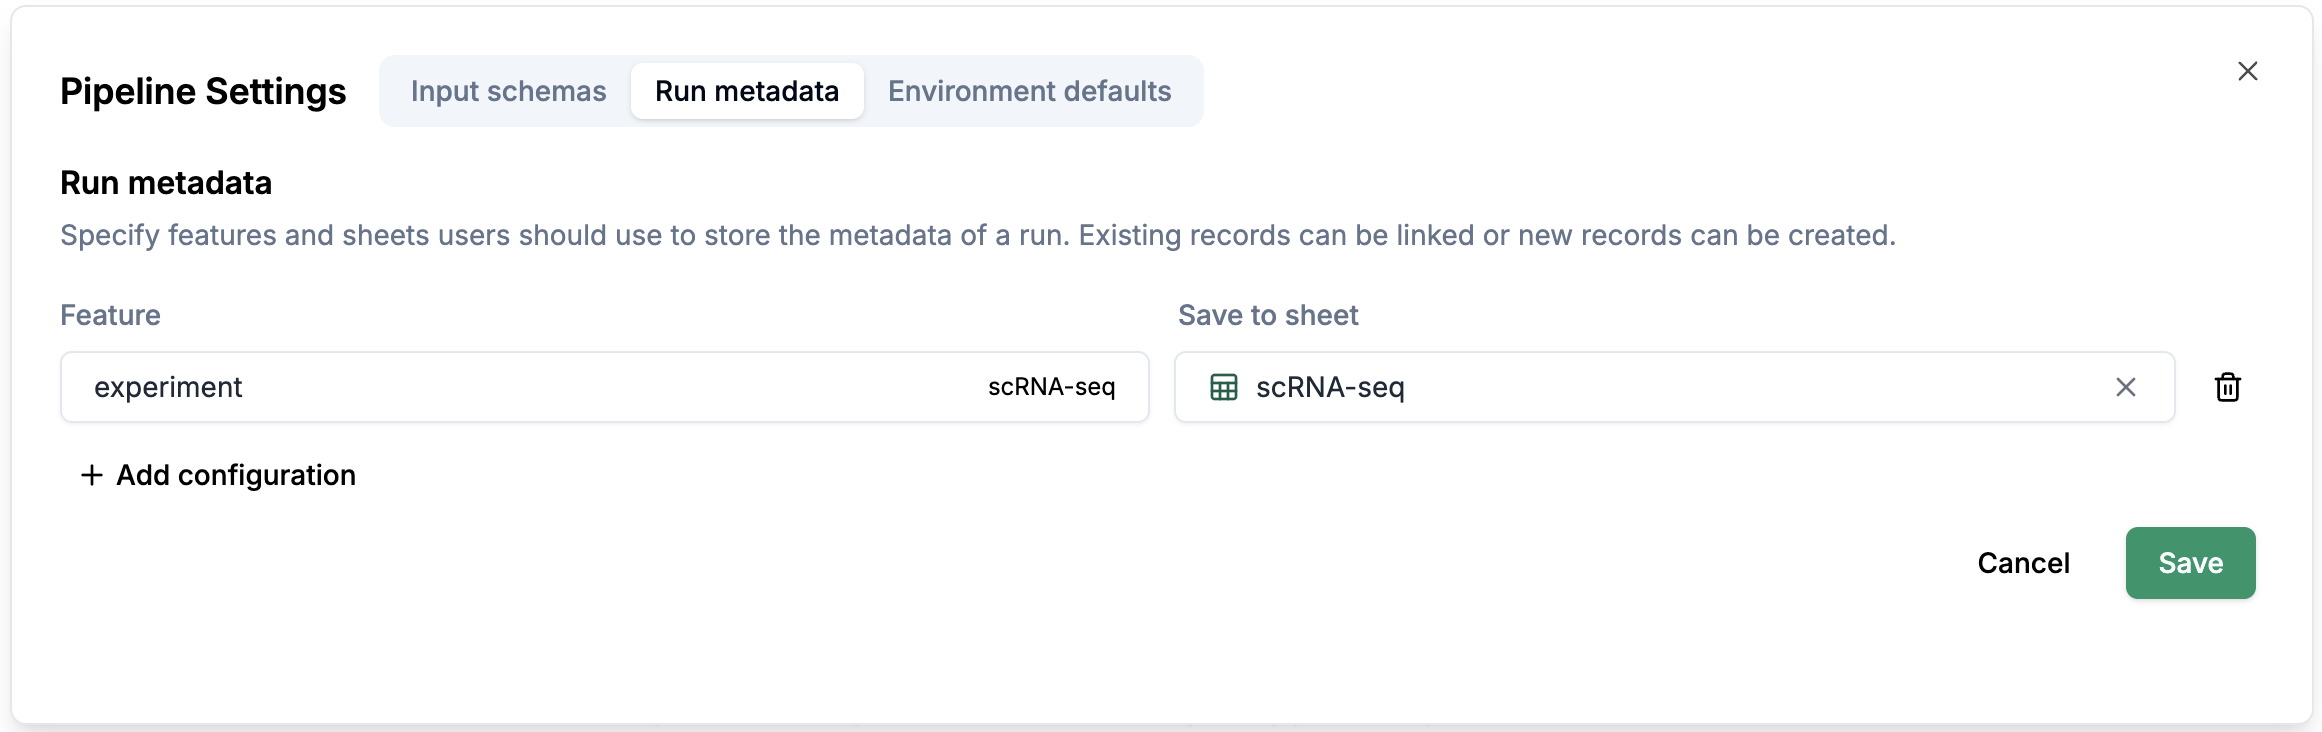
Environment defaults: You can configure the environment defaults for the pipeline.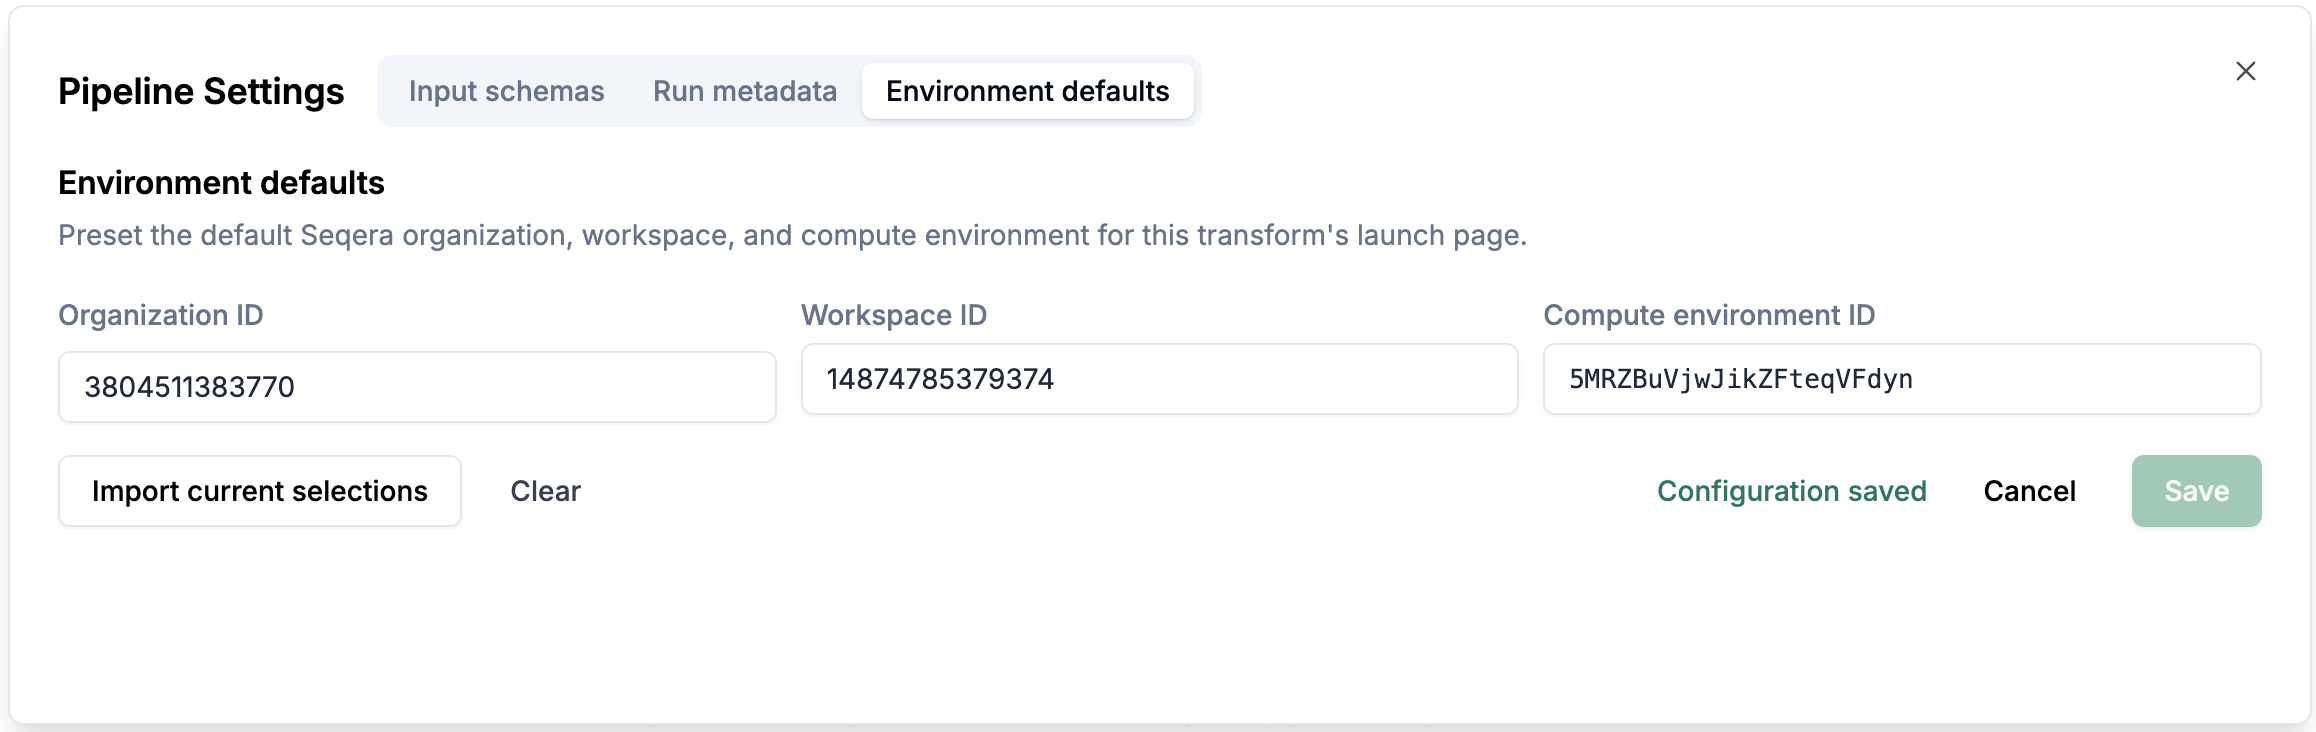
Configure pipeline sections:
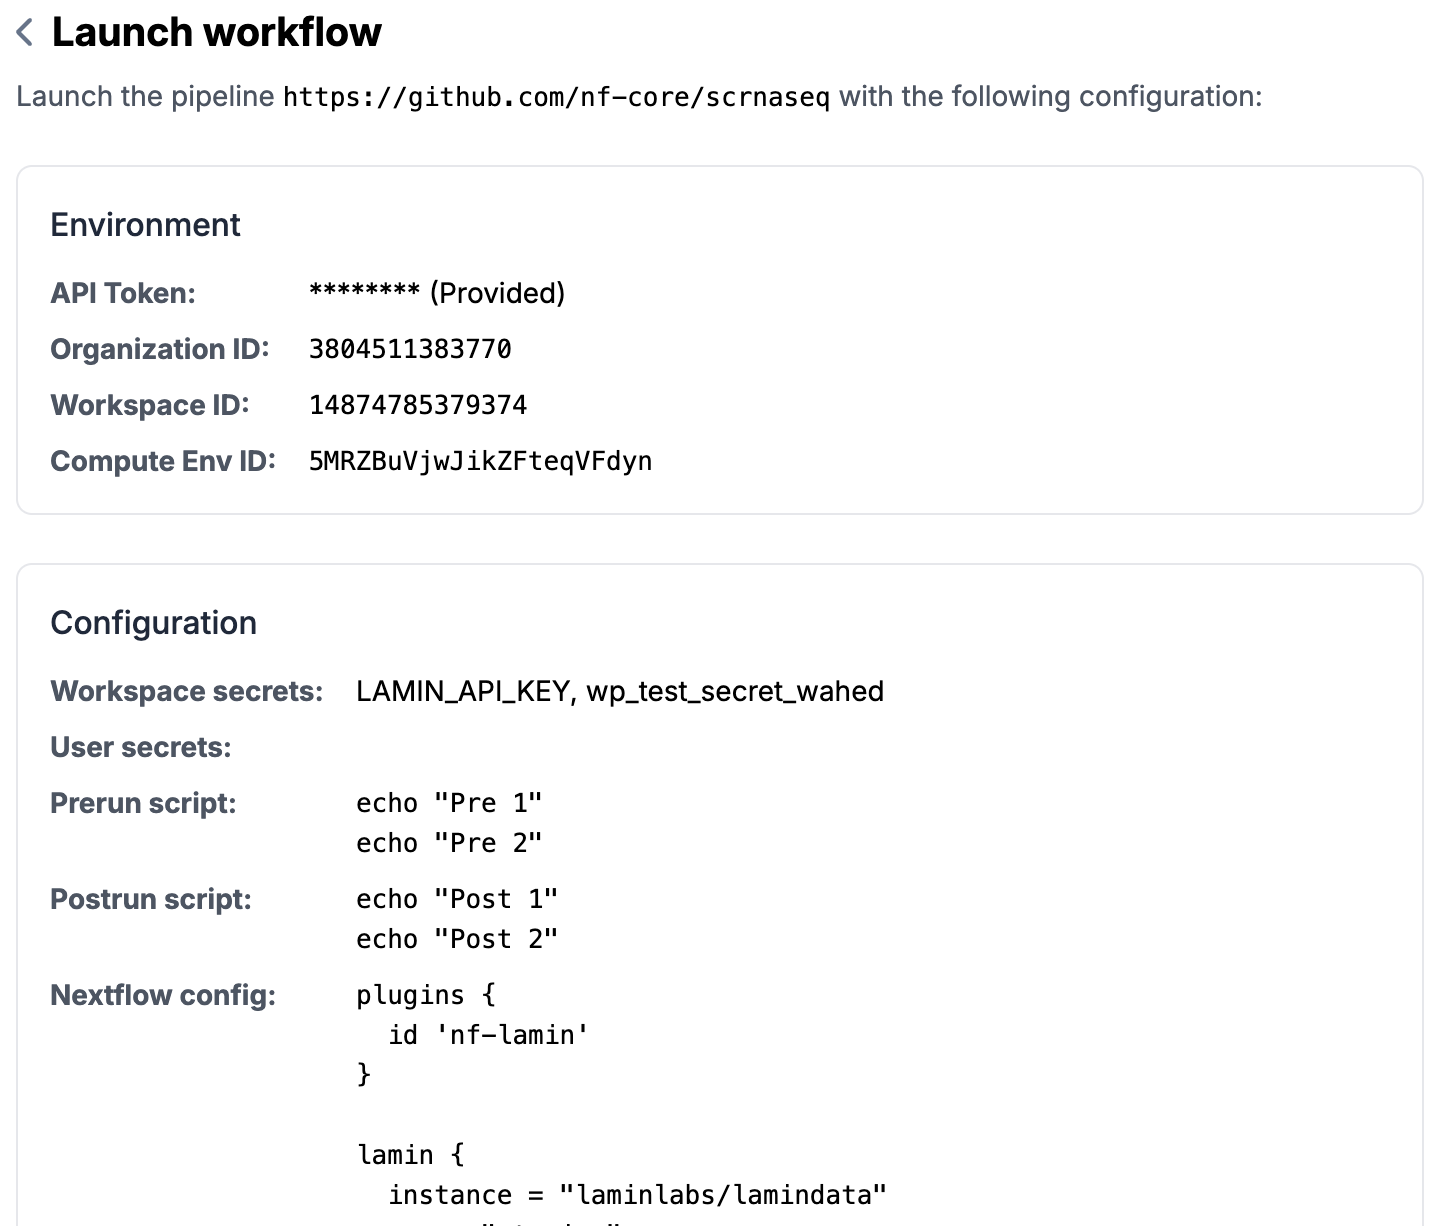
Configuration
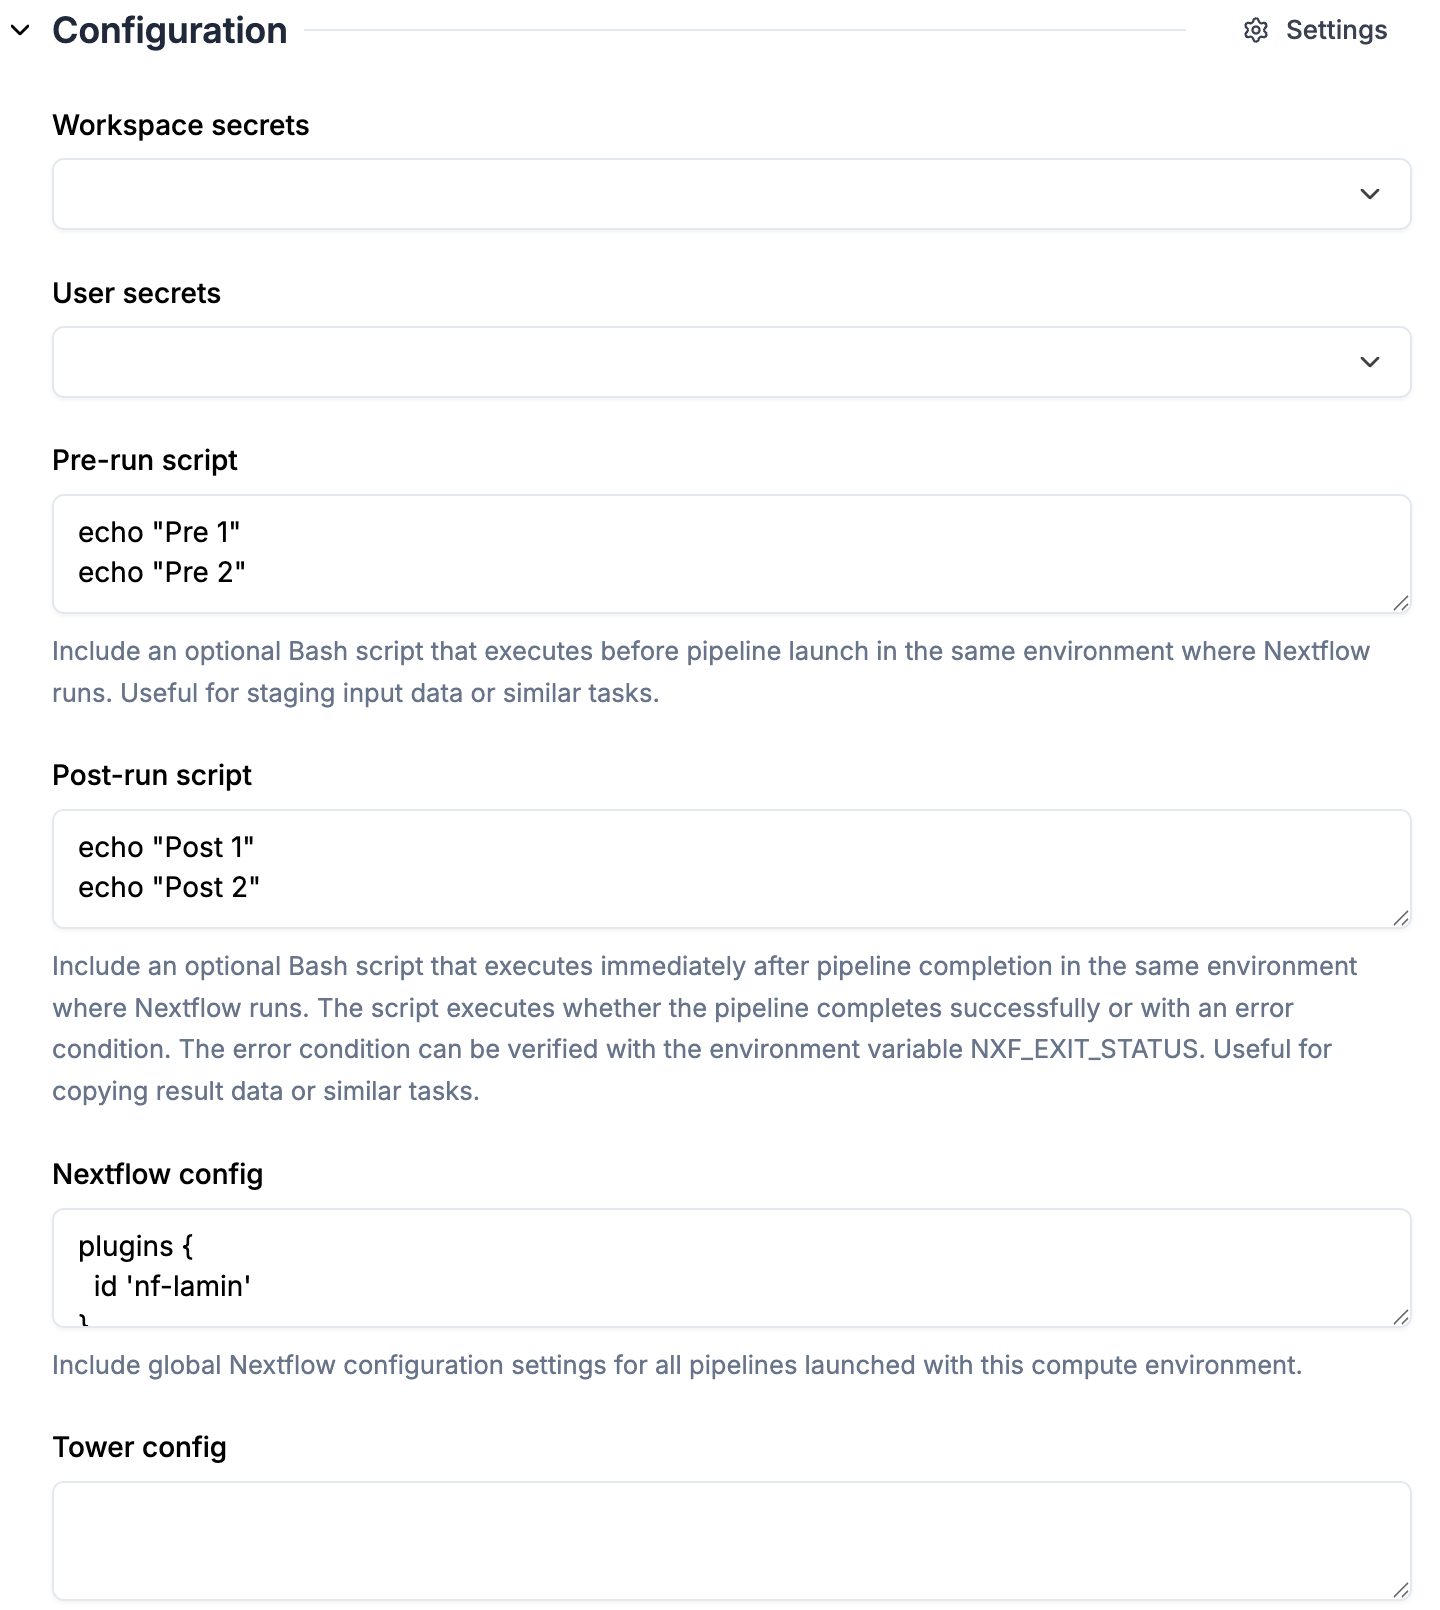 1. `pre-run script`, `post-run script` and `nextflow config` are automatically pulled from the selected `Compute environment`
2. Check the `nf-lamin` plugin is specified in `nextflow config` (synced from the selected compute environment)
1. `pre-run script`, `post-run script` and `nextflow config` are automatically pulled from the selected `Compute environment`
2. Check the `nf-lamin` plugin is specified in `nextflow config` (synced from the selected compute environment)
Pipeline
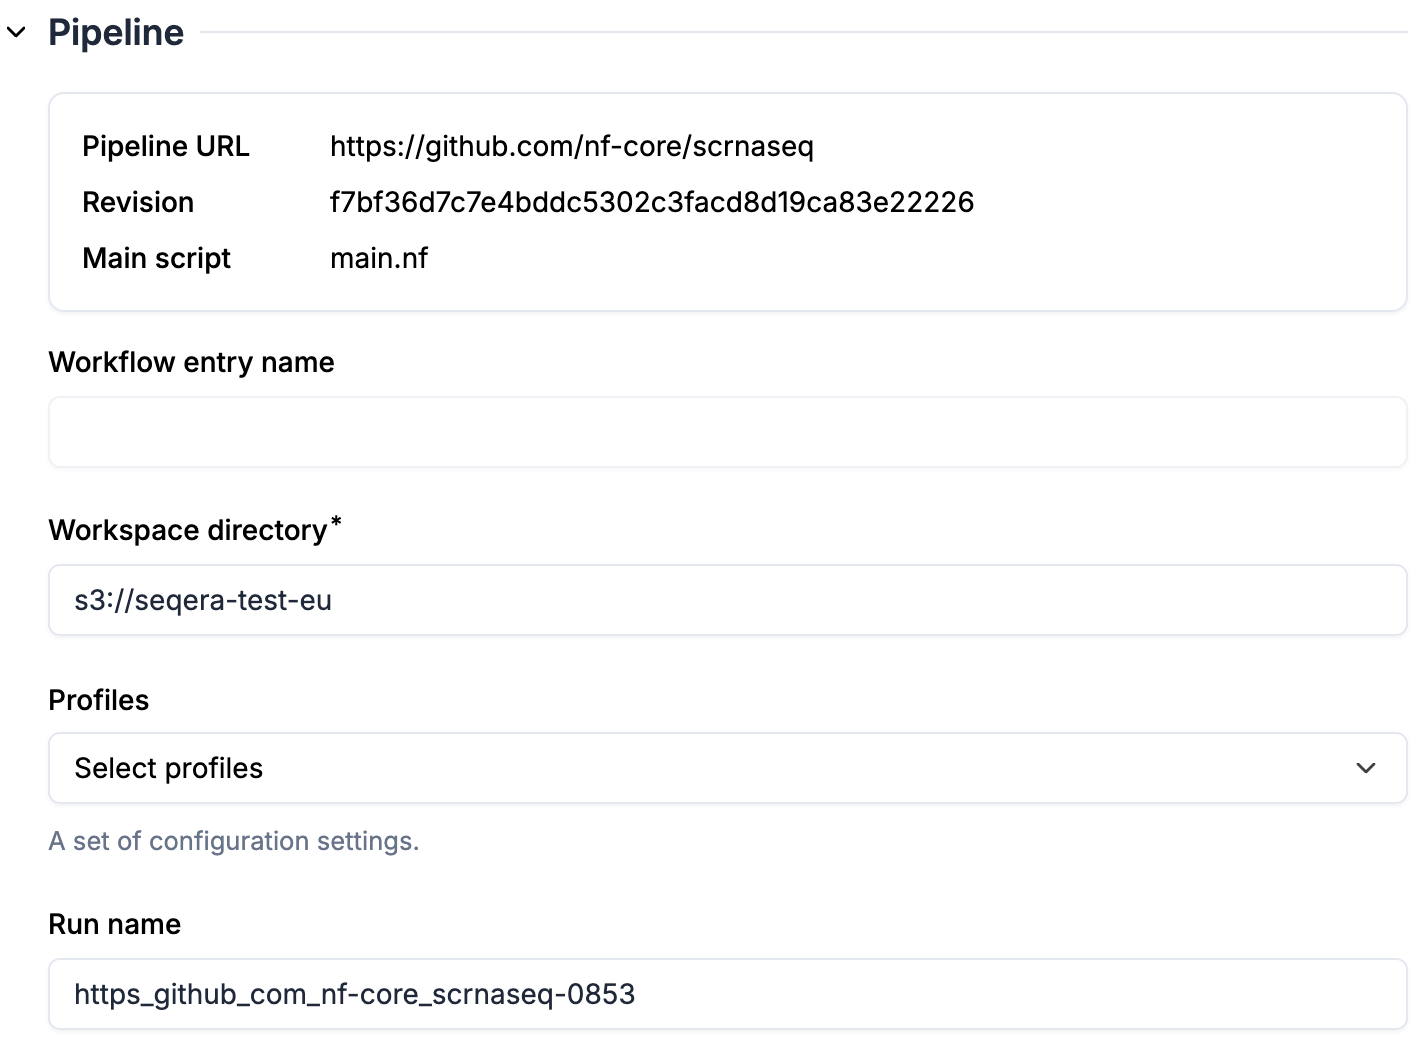 1. `Pipeline URL` and `Revision` are specified in transform attributes, therefore immutable here (register a new transform if you want to run a different revision of the pipeline)
2. `Workspace directory` is pre-filled from the compute environment
3. Optional: select `Profiles`. Once profiles are selected, you will see parameters automatically populated based on the profiles.
4. Optional: enter a `Run name` if you don't want to use the default name
1. `Pipeline URL` and `Revision` are specified in transform attributes, therefore immutable here (register a new transform if you want to run a different revision of the pipeline)
2. `Workspace directory` is pre-filled from the compute environment
3. Optional: select `Profiles`. Once profiles are selected, you will see parameters automatically populated based on the profiles.
4. Optional: enter a `Run name` if you don't want to use the default name